
What is an MCP server?
The Model Context Protocol (MCP) is quietly becoming one of the most useful ideas in AI tooling. Here, we describe what MCP is, why it matters, and how to build an MCP server yourself.
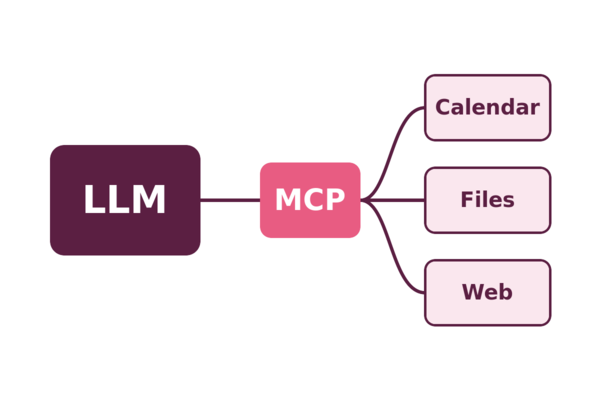
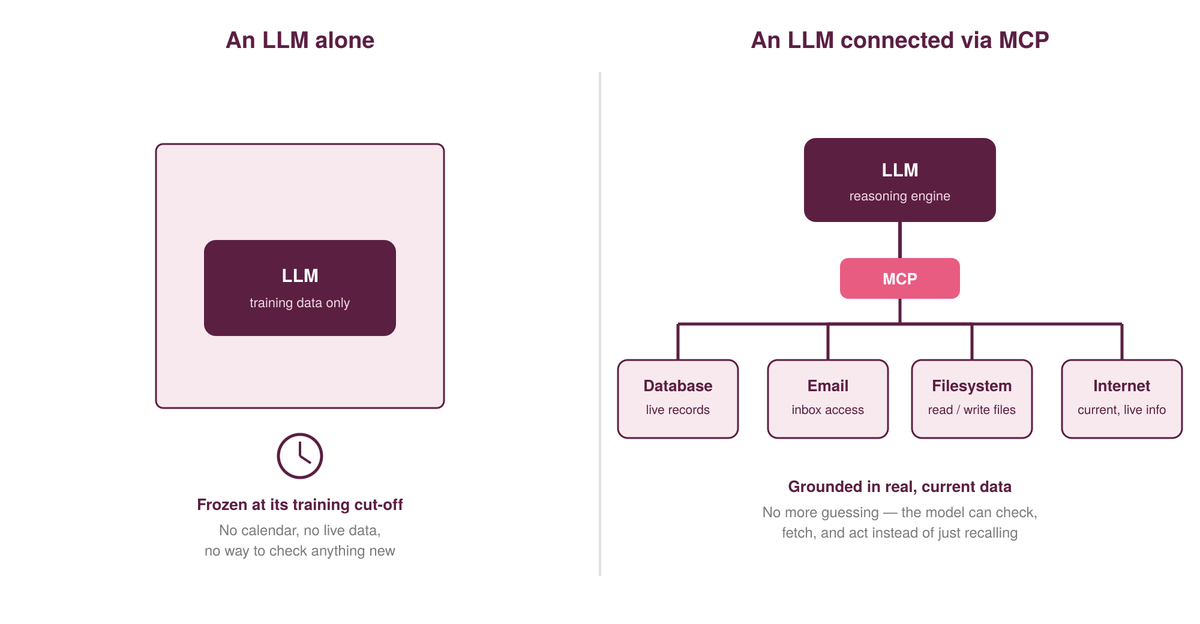
MCP is a standard way to link a Large Language Model (LLM) to the outside world. An MCP server is a small piece of software that exposes some data or capability to an AI model. Everyday examples include connecting your AI agent to your calendar or your file system, or allowing it to search the web. These are things an LLM cannot do (or would struggle to do) by itself. On its own, a model only knows what it learned during training, plus whatever you provide it, and it has no way to check, fetch or act on anything beyond that. Even then, it can only give out text responses, which you have to be the one to act on. An MCP server can allow an LLM to carry out actions itself. Less talking, more doing.
Why not just use an API?
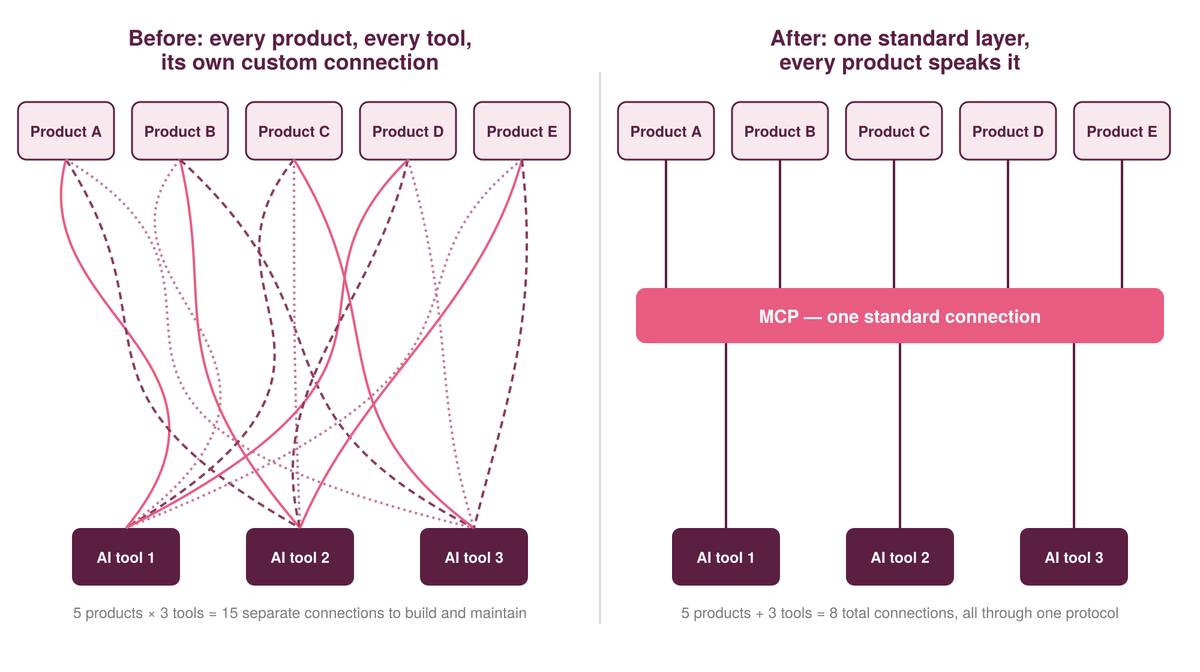
There are many ways to connect external capabilities to an AI model, usually via an API (Application Programming Interface), and this was the industry standard. However, APIs are all configured slightly differently, and once you start to scale up the number of connections you need between multiple pieces of software, you hit a combinatorial problem: the number of custom connections a product needs multiplies by the number of tools that use it.
Anthropic introduced MCP in late 2024 as an open standard for connecting tools and data to LLM applications. It works like a USB port on a computer: any MCP server can be used with any agent/model, whether you are using Claude, Gemini, ChatGPT or one you’ve made yourself.
Building your own MCP server
Full instructions on how to build an MCP server are available in the MCP documentation, but here is a very quick overview using Claude Code and the Sonnet 5 model.
The good news is that a working MCP server can be as short as a few lines of code. Here’s the shape of it, step by step, using Python.
Step 1: Install the dependencies
The MCP project maintains official SDKs for Python, TypeScript and other languages. The Python ‘mcp’ package embodies this SDK. However, here we are going to use the ‘fastmcp’ package. This is built upon ‘mcp’, but has some benefits (in particular, ‘fastmcp’-based tools can readily be deployed on Posit Connect, see later).
mkdir -p ~/projects/
cd ~/projects
uv init --python=3.15 dice-roll
# Initialized project `dice-roll`
# at `/home/<user>/projects/dice-roll`
cd dice-roll
uv add fastmcp
This gives us the following project structure, which is typical for a ‘uv’ project.
We will define our MCP server in ./src/dice_roll/__init__.py, although if the project got much
larger, we would split it into separate modules or sub-packages.
tree -L 2
.
├── pyproject.toml
├── README.md
├── src
│   └── dice_roll
└── uv.lock
Step 2: Define a tool
An MCP server exposes “tools”: functions the model can call. Here is a mini example: a server with a single tool that rolls a dice.
# src/dice_roll/__init__.py
from typing import Annotated
import random

from fastmcp import FastMCP
from pydantic import Field

# Give your server a name: this is what shows up when a model connects
mcp = FastMCP("dice-pick")

@mcp.tool
def roll_dice(
    sides: Annotated[int, Field(description="Number of sides on the dice", ge=2)] = 6,
) -> int:
    """Roll a single fair dice with the given number of sides and return the number rolled."""
    return random.randint(1, sides)

def main() -> None:
    mcp.run()
The @mcp.tool docstring (“Roll a single …”) is important.
This becomes the description of the tool that the LLM reads.
It is like the blurb of a book: the LLM will look at the description and from it decide whether it
wishes to use the tool or not.
If this description isn’t clear, it may lead to the tool not being used.
The type annotations for both the parameter sides and the value returned by roll_dice() also
provide useful metadata for the LLM.
Our sides parameter has a constraint that ensures at least 2 sides are present on the dice
(ge=2; this is enforced within Python by
Pydantic).
When describing the tools provided by this MCP server, an LLM will be able to explain that the
minimum number of sides is 2 (and more advanced models may not call the tool otherwise).
Step 3: Connect it
Save the code in the project, and we will test whether an MCP-compatible agent can use it. There are a few ways to register our locally-defined MCP server with Claude Code.
Since we have used the fastmcp framework, there is a command line tool that installs the MCP
server for use from the project directory:
# From the ~/projects/dice-roll/ directory
uv run \
  fastmcp install claude-code src/dice_roll/__init__.py:mcp --with-editable .
The uv run part is necessary to ensure the correct Python environment is used.
The fastmcp command needs to find the mcp object that we have defined in our source code.
If we open claude and ask “What dice-pick tools do you know about?”, it replies:
The dice-pick MCP server gives me one tool:

roll_dice: rolls one fair dice and returns the number it lands on.

┌───────────┬─────────┬─────────┬───────────────────┐
│ Parameter |  Type   │ Default │    Constraint     │
├───────────┼─────────┼─────────┼───────────────────┤
│ sides     │ integer │ 6       │ must be 2 or more │
└───────────┴─────────┴─────────┴───────────────────┘

So I can roll a d6, d20, d100 or any other single dice. It can't roll several dice in one call, add
modifiers or pick from a list. For something like 3d6, I'd call it three times.
Then we can use the tool:
❯ Roll a dice
  Called dice-pick
I rolled a 6 on a standard six-sided dice.

...

❯ Roll a 20-side dice
  Called dice-pick
I rolled a 20 on the d20.

That's the highest number on both rolls so far. [... blah blah blah ...]

...

❯ Roll a d12
  Called dice-pick
I rolled a 4 on the d12, so the run of top scores is over.
We have installed our locally in-development MCP server on our machine, but it’s only usable from
the ~/projects/dice_roll directory.
This is fine while you are testing, but you may want to use your MCP server in other locations once
it works well.
Our project is uv-based.
If we tell it which module and function should be called to start the project running, we can make
the project more easily usable from other locations.
But, the entry-point function used to start our MCP server running is dice_roll.main(), which uv
has already added as the entry-point to the project in the pyproject.toml:
[project.scripts]
dice-roll = "dice_roll:main"
On running uv run python or uv sync, a dice-roll entry-point will be added to the virtual
environment for the project.
For Claude Code, we can then register our MCP server with a single command:
claude mcp add --scope user dice-pick \
  -- /abs/path/to/projects/dice-roll/.venv/bin/dice-roll
Now, you can ask claude to “roll a 20-sided dice” from any directory on your computer and it will
call your tool directly rather than guessing at an answer.
This is possible because claude mcp add ... appends to the mcpServers entry of a file
(~/.claude.json).
A few tips before you build something bigger:
- Keep tool descriptions (the docstrings for your
@mcp.tool-decorated functions) short and specific. The model relies on the docstring to decide when to use a tool, so vague descriptions lead to it being ignored or misused. - Think about what should require confirmation. Read-only tools (like looking something up) are usually safe to let a model call freely; tools that change or delete something are worth gating behind an explicit user confirmation step.
You can remove the MCP server from your claude setup by using
claude mcp remove dice-pick
Or just ask Claude to remove it!
Deploying to Posit Connect
A server running on your own machine is fine for testing, but it is only useful to you. MCP servers can be deployed to a range of different cloud providers. Posit Connect, the platform we normally reach for when publishing Shiny apps, Plumber APIs and Quarto reports, added first-class support for hosting MCP servers in 2026, complete with a dedicated icon and its own tab in the content list.
Posit Connect does expect you to write your Python-based MCP servers using the fastmcp framework
that we used above.
Connect also needs to import a runnable application object that can handle HTTP-based requests.
When deployed, ‘fastmcp’-based MCP servers can expose an ASGI app object that handles these
requests.
Locally run servers use ‘stdio’ routing, but we only have to modify our current source code slightly
to deploy to Posit Connect.
# imports ...

mcp = ...

def roll_dice():
    ...

app = mcp.http_app()  # For deployment on Connect

def main():
     mcp.run()  # For running using stdio locally
For deployment of the MCP server to Posit Connect, we also need to create a requirements.txt file.
These are used to specify the run-time (and sometimes development) dependencies of a project.
Since we used uv to manage the project, this is easy to create:
uv export --no-dev --no-hashes -o requirements.txt
The requirements.txt file contains a line -e . that dynamically includes any source code from
src/.
The Python environment that is built for your MCP server depends upon requirements.txt and is
rebuilt when that file is updated.
We use the rsconnect-python package (and the rsconnect command line tool that it installs) to
interact with Posit Connect.
You may first have to register with your Connect system using rsconnect add ... or
rsconnect login ....
Then you can deploy with the rsconnect tool, using the FastAPI deployment mode and pointing the
entrypoint at the app object that we have just added to the source code.
This is done using a --entrypoint argument of the form module:object_name. Here this is
dice_roll:app, since our app object is in the dice_roll module:
rsconnect deploy fastapi -n <nickname-of-posit-server> --entrypoint dice_roll:app ./
The Posit Publisher extension for VS Code and Positron works too, if you’d rather deploy from your editor. Posit has some good documentation on publishing MCP servers.
On first deployment, Connect scans requirements.txt, recognises fastmcp, and automatically sets
the content type to MCP.
Once deployed, it keeps at least one process warm so there is no cold-start delay, and gives
it its own icon in the content list, with no extra configuration needed.
Using your deployed MCP server
To use an MCP server that is deployed in the cloud, the process is very similar to how we added our
locally-defined MCP server.
On Posit Connect (or wherever you have published), you will have a URL for the MCP server and you
can configure claude to use this URL as follows:
claude mcp add --transport http <mcp-name> https://<connect-server>/content/<content-hash>/mcp
Here we used dice-pick as the name of the MCP server, consistent with the name in the source code.
When you next open claude you will be prompted to authenticate before you can use the tool.
Want to see this in action? Watch this walkthrough, recorded live at our AI in Production 2026 conference, of an MCP server being built and used from scratch.
Key takeaways
- An MCP server is the standard way to give an AI model access to things it can’t do alone: checking a calendar, reading a file, searching the web, or looking up live data.
- It works like a USB port: build the connection once, and any compatible model can use it.
- A working MCP server can be as short as a few lines of code. The model calls your tools directly instead of guessing at an answer.
- Keep tool descriptions short and specific, and gate anything destructive behind explicit confirmation.
- Posit Connect can host your MCP server directly, so your whole team can use it rather than just your own machine.